First things first, you're the realest...ARMA3 server out there! ARMA3 is a very extensible game, which means it comes with a few caveats here and there that we need to overcome to get you on your way to a functioning ARMA3 Server. So, you've just bought your server, and received your login details - what now?
How to...
First thing is to get the server installed - due to the way ARMA3 functions on the Steam CDN, you need to give your server your Steam login credentials in order for the server to download. So lets go ahead and do that, and get that setup.
- Login to your Game Server Instance - this is a URL something along the lines of https://au.gamecontrol.southnode.net/?instance=abcd1234 where the instance= part denotes your particular instance GUID. It's very important you don't change that.
- Once you login, your server will be attempting to install/update - you'll be greeted with the following screen:
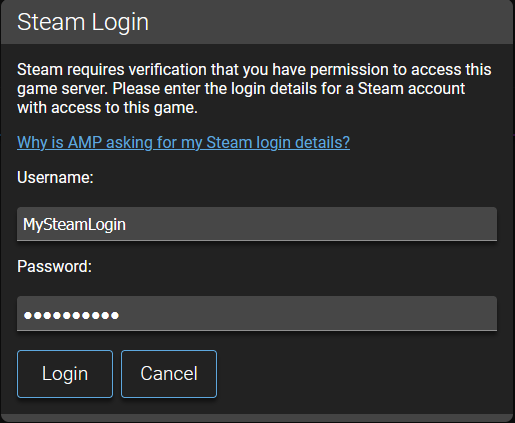
- Enter in your Steam Login credentials - the reason we need this is ARMA3 is a server repository on Steam that requires you to be logged in to download it (Thanks BI...) - you may also be prompted for a Steam Guard code if your account has that enabled. Once you login, you can head to the Console menu item to watch it install if you are so inclined.
Next, we look at basic setup. For mods and the like, we would highly recommend looking at our Knowledgebase Article on (Modding KB), but for now, lets get the server online!
- Head to the Configuration > ARMA Server Settings - here you'll be presented with a bunch of options, and each of these controls something on your server. Normally these settings are hidden down in some file somewhere, however the control panel will override these selections in a much more user-friendly way - in a GUI! Set your Server Name, a password/admin password, anything you need to get yourself started and get the server online - pay attention to each item's description:
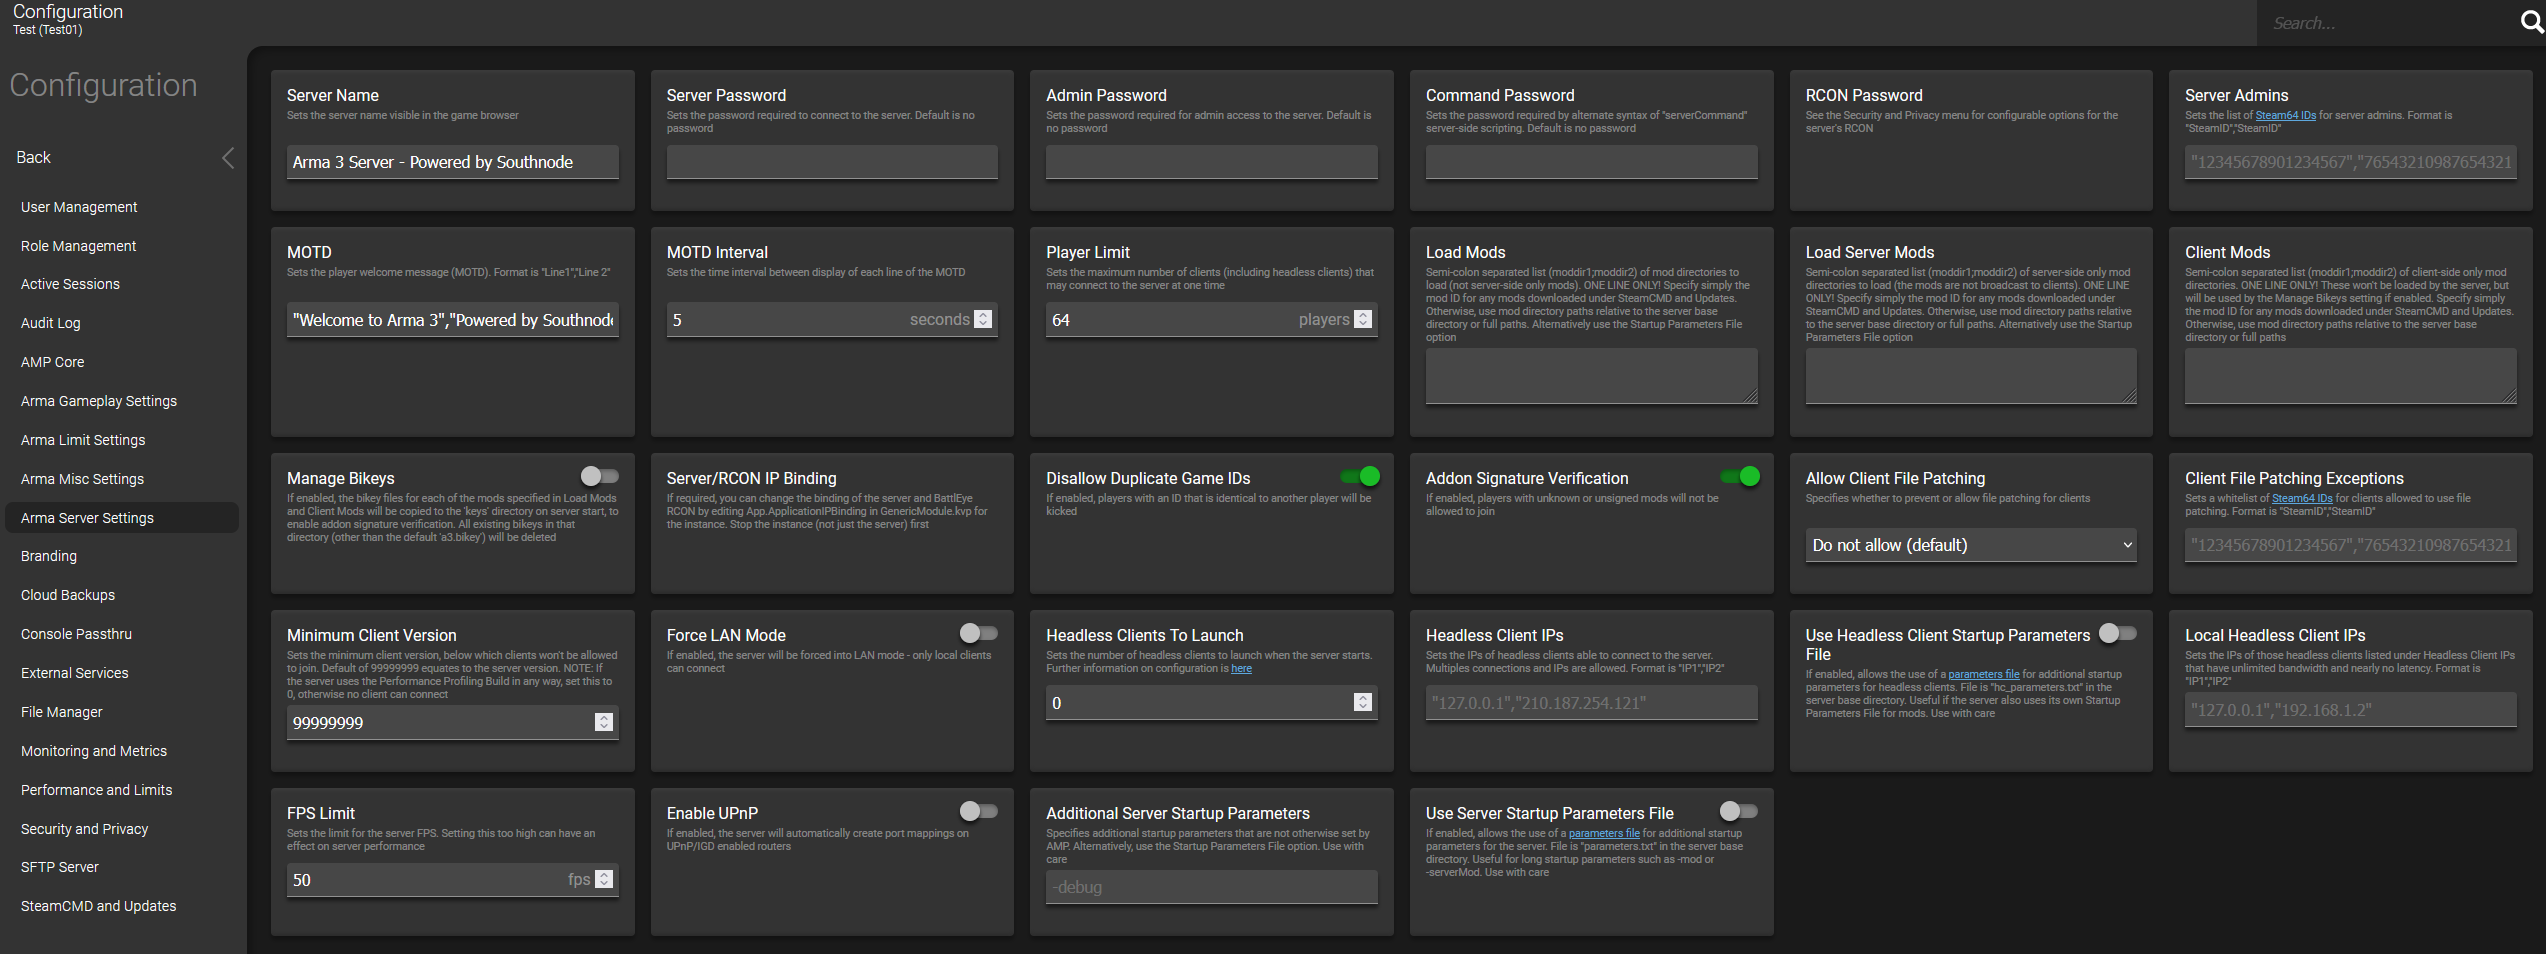
- Once that's sorted, you can go back to the Status screen (the homepage for your Game Server Instance), and hit start - your server should be up and running, and most importantly, visible on the Server Browser with your new server name!
For more information on tweaking settings - descriptions for each setting can be found in their respective menus - ARMA Limits Settings, ARMA Misc Settings, and ARMA Gameplay Settings. You can search for a setting using its formal name (eg allowedFilePatching) using the search bar in the top right corner of the screen. Additionally, when talking about Mission Rotations and such - your Game Server Instance uses a file called AMP_server.cfg to control ARMA3’s settings. This file is in the server base directory within the File Manager. This file writes the relevant settings to server.cfg, which is then loaded by the server. Don’t edit server.cfg directly - your Game Server Instance will overwrite it.
AMP_server.cfg has two sections. You should not change the first section, labelled "// SETTINGS CONTROLLED BY AMP - DO NOT TOUCH THESE!!!", in any way.
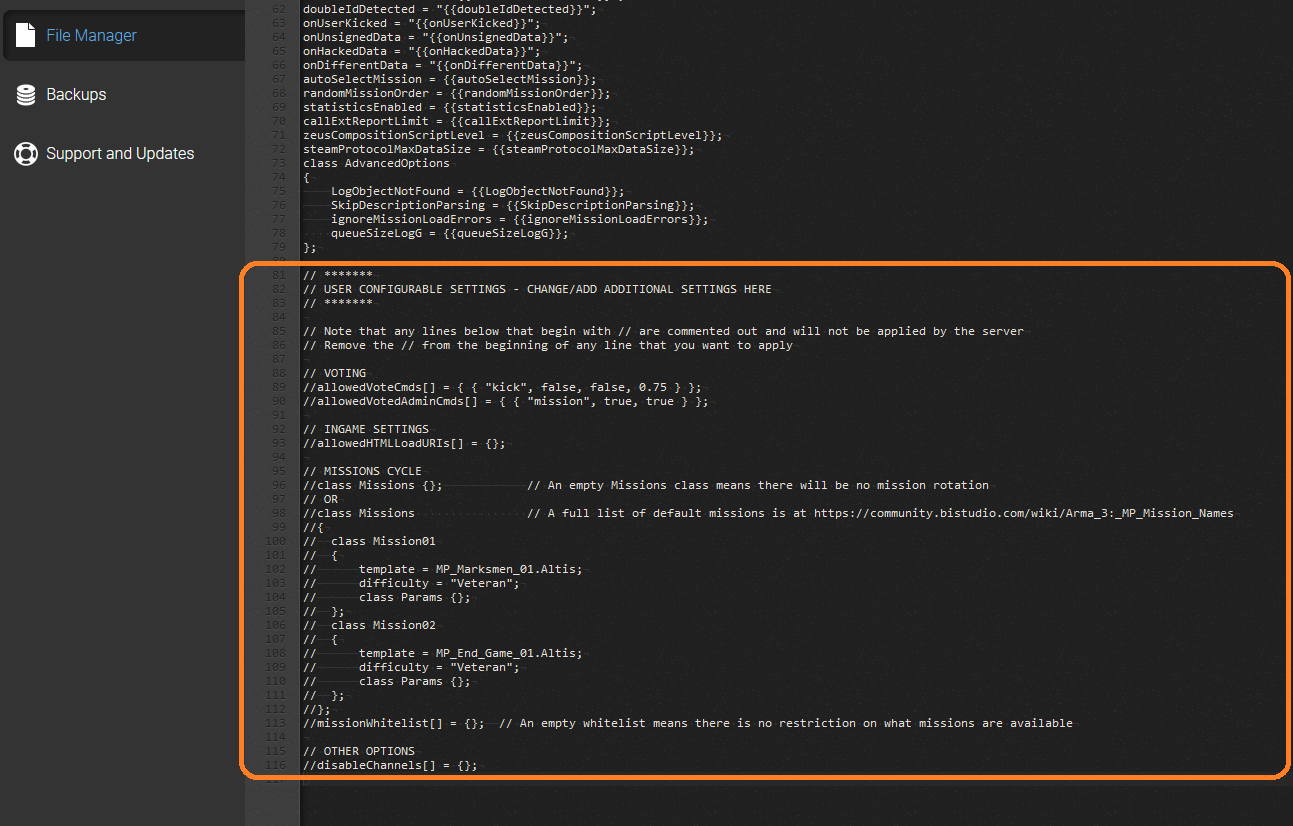
Any settings that are not handled by your Game Server Instance in the first section can be configured in the second section, under “USER CONFIGURABLE SETTINGS”. This applies particularly to mission settings, including mission cycles and is needed for starting missions under the Creators DLC's.
Further Reading
Activating the Creator DLCs for your ARMA3 Dedicated Server
Enabling S.O.G Prairie Fire for your ARMA3 Dedicated Server
How to load Mods on your ARMA3 Dedicated Server
