Are you looking to adventure further away from the vanilla generated minecraft worlds and want to start exploring a Custom world on your Minecraft server? Perhaps chasing zombie villagers through the streets of Rome?
Here's the steps involved with adding that exciting new custom world to your Minecraft server with Southnode.
How to...
Step 1 - Login to your game control panel and navigate to Configuration > Server Settings. Here we are looking to specify the game versions and server type (Forge or Spigot for example). If you are also looking to run mods then ensure the correct server type is selected so these operate as planned.
My example map is Official Version 1.20.4 and that's been selected.

Step 2 - Navigate Back to the Status module, from here we want to select update. This will apply the specific server versions and type as applicable.

Step 3 - Now that we have the server configuration ready and updated, let's jump into uploading the custom world to your server. We will be using SFTP to transfer the files with the KB article on how to connect available here: Getting-Large-Files-in-and-out-of-your-Server
Once you have connected to your gameserver via SFTP, navigate to the new custom world you want to want to use (we recomend having a simple world name for the folder) and select upload. Make sure you are transfering this into the / root directory.

Step 4 - Once the file transfer is successful you should now see the custom world folder in the remote site like the below example.

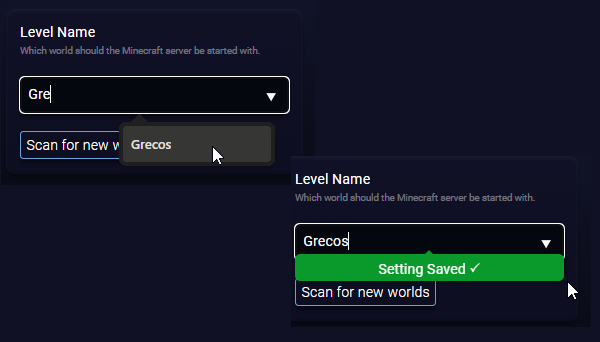
Step 5 - Let's jump back into your game control panel and navigate to Configuration > Server Settings. From here we are now going to tell the server to use our recently added custom map with this configuration under the "Level Name" parameter. The way to select what world to use is to start typing the name of the world folder we just uploaded in Step 3 (this is why we recomended a simple name) so for this KB we are looking for Grecos, start typing and it should appear in the drop down tab, once you've selected it the setting will be saved.
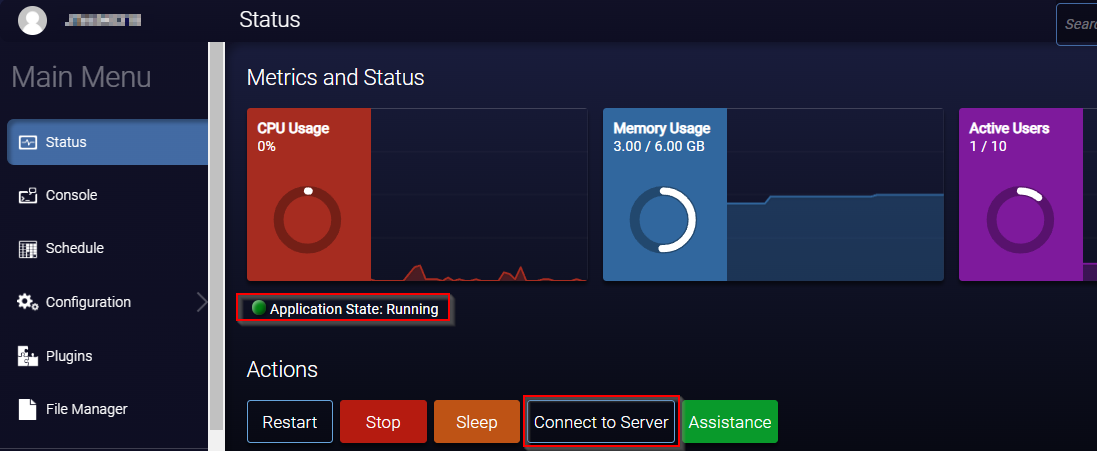
Step 6 - Congratulations you are now ready to start exploring the new custom map! Navigate back to the Status tab and under actions select "Start" and then wait to see the "Application State: Running" Success! You can grab the Minecraft server details from the "Connect to Server" button with IP address.

Step 7 - Success we've now connected to our Minecraft Server running the Grecos custom world! Let's see if i can chase down a Souvlaki!

Further Reading
Control-Panel---First-Login-and-Status-Indicators.
Getting-Large-Files-in-and-out-of-your-Server
Importing-your-existing-Minecraft-server-to-Southnode
